Lights
Instructions
Click on the links below to download instructions (pdf format).
For technical questions about SON generator hubs, please check the manufacturer’s web site.
More Information
How many Lumens do SON lights put out?
The light output in lumens is easy to calculate, but it doesn’t tell much about how good a light is. What is important is how many lux illuminate a given area of road surface. This is determined by the beam shape and how the light output is distributed. Read more…
Which hub do you recommend for my bike?
We’ve selected what we think are the best generator hubs for most riders. For road and gravel riding, the SON Delux has the lowest resistance, wide flange spacing for the strongest wheels, and lightest weight. The SON Delux is available in models for disc brakes (12 mm thru-axle) and rim brakes (quick release). For rim brakes, we prefer the Wide-Body version, because it builds a stronger wheel and flexes less. For mountain bikes (12 or 15 mm thru-axle), the SON 28 gives more light at very low speeds. All SON hubs feature the unique pressure compensation system that prevents moisture from entering the hub during temperature changes
Why doesn’t the Edelux headlight have a port for charging electronics?
It would be nice to have an integrated port for charging electronics: Just plug your device into your headlight and charge as you go. Unfortunately, there’s a hitch: At moderate speeds – the speeds most of us ride most of the time – we’re right at the threshold between charging and not charging. Imagine plugging in and unplugging your electronics dozens of times during the charging process – not healthy for the batteries! Instead, SON recommends external chargers that you connect to your generator hub. These chargers have large capacitors to buffer the frequent On-and-Off cycles, so that your electronics receive a constant charge.
Headlights don’t have enough space inside for these bulky capacitors… If you only charge your electronics when you ride really fast, that’s OK. Otherwise, it’s not ideal.
My generator hubs seems to have a lot of resistance. Is it broken?
It’s almost impossible to feel the resistance by just spinning the hub axle. You feel the magnets opposing and attracting each other. As the wheel turns, these impulses cancel each other, and the hub runs smoothly. To test the hub, turn off the lights, lift the front of the bike, and spin the wheel. The hub should turn several revolutions before it stops. If the wheel rotates less than a full turn even after you give it a good spin, it may be defective. If the hub is within the warranty period, please contact us to start a warranty request. If the hub is outside the warranty period, it can be repaired for a fee.
Hubs with the SL system will short-circuit if you put them in a truing stand. Then the resistance goes up exponentially – so much that they wheel can jump out of the truing stand. This does not indicate a defect of the hubs. The solution is to insulate the truing stand – for example, you can put pieces of inner tube over the forkends before you insert the wheel.
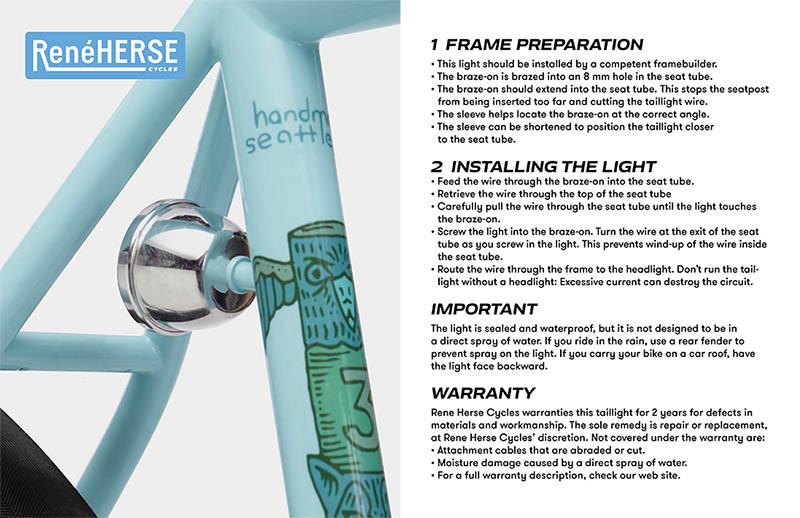
My headlight/taillight does not illuminate
Modern LED head- and taillights are extremely reliable. In 99% of cases, problems are due to wiring issues, not because the light itself is faulty. If your bike uses the SL system without connectors, make sure your wheel is installed correctly. (Flip it around and see whether the light works then.) If you have performed trouble-shooting below and concluded that your light or hub is faulty – and if the parts are within the warranty period – please contact us.
Trouble-Shooting Generator-Powered Lighting Systems
- To test the generator hub, disconnect the lights. Spin the wheel and use a screwdriver to short-circuit the two tabs on the hub. (Be careful that the screwdriver does not get into the spokes!) Now the wheel should slow down very quickly. Remove the screwdriver, and you’ll probably see some sparks. If the wheel doesn’t slow down even though the two contacts are short-circuited, the hub no longer produces power. It needs to be repaired.
- Don’t try to test the light by connecting it to the hub. Use a small transformer that outputs between 5 and 9 volts to see whether the light itself illuminates. If you don’t have a transformer, a 9 volt battery will work in a pinch. (Use both transformer and battery only briefly, since they may put out more power than is ideal for the lights.) For headlights, hold one wire to the ‘Plus’ (+) terminal and the other to the ‘Minus’ (-) terminal. For taillights, hold the wire to the ‘Plus’ (+) terminal and push the housing onto the ‘Minus’ (-) terminal.
- If the light does not illuminate, then the light may be faulty. If the light illuminates when tested alone, then the light is not faulty.
- Make sure your connectors are attached correctly to the wires. If the connectors are slightly loose, oxidation will interrupt the current flow over time. If you have any doubts, remove the connectors and check your light without them.
- Short circuits can occur if your wire’s insulation is damaged. Also makes sure that your taillight connector is surrounded by heat-shrink tubing. Otherwise, it can short-circuit on the Edelux headlight housing.
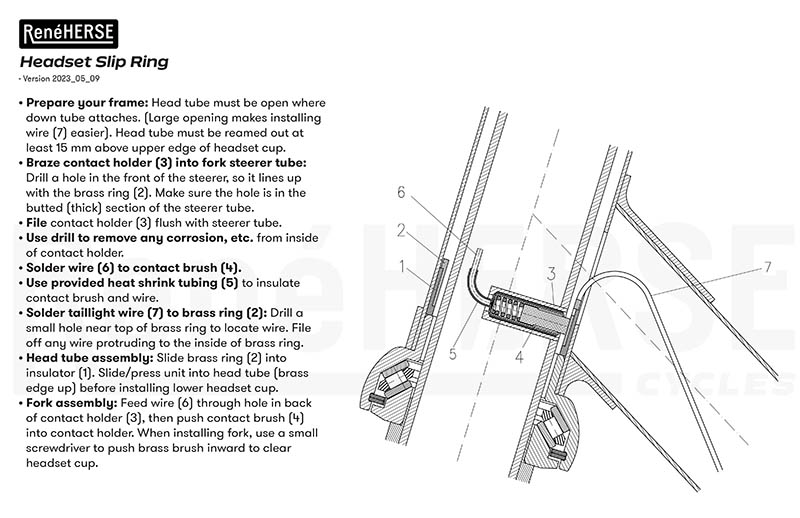
- Remember that electricity needs a return path: There is a ‘Plus’ and a ‘Minus.’ For Edelux headlights used with the SL system and for Rene Herse taillights, the return path goes through frame and fork. If that path is interrupted, the light will not work. Interruptions can be caused by anodized headsets, carbon forks, powder-coated racks, paint on the dropout faces, etc. Use a voltmeter to check the resistance between headlight housing and taillight housing. The resistance should be close to zero. For headlights using the SL system, also check the path from the non-SL dropout to the headlight housing. If your meter shows significant resistance, the current does not flow, and your lights will not illuminate.


